

How to Record Vocals at Home: Clean Guide Takes on Any Microphone
Learn how to record pro-quality vocals at home without an expensive vocal booth. Discover bedroom acoustic hacks, mic placement, and gain staging for modern vocal production.
By Vocalist.ai Editorial Team · June 11, 2026 · 5 min read
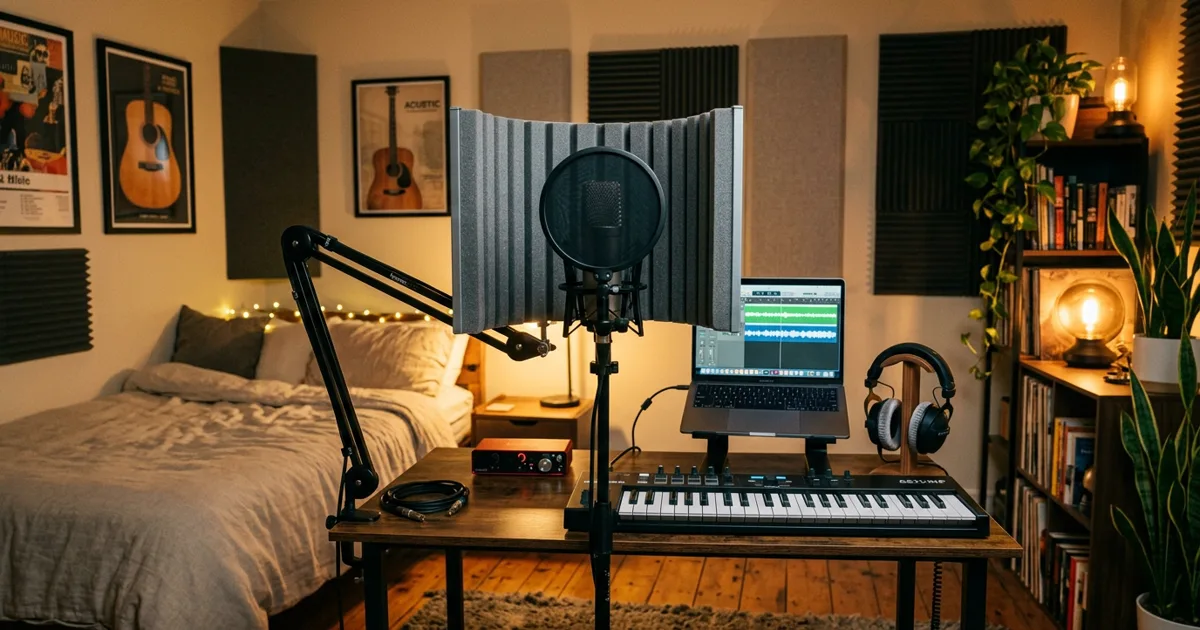
You do not need a multi-million-dollar recording facility or an isolated vocal booth to capture studio-quality vocals. Countless Grammy-winning hits and chart-topping vocals have been recorded in bedrooms, living rooms, and hotel closets.
However, recording vocals at home comes with distinct challenges: boxy room reflections, computer fan hum, traffic noise outside the window, and improper gain staging.
If you are tracking vocals at home - whether for a final commercial mix, a songwriting demo, or a guide track to feed into AI vocal transformation tools - here is how to turn any domestic room into an effective vocal tracking environment.
1. Tame bedroom reflections: Why dry audio beats expensive gear
The single biggest giveaway of an amateur home vocal recording is not the microphone - it is the room.
Standard domestic rooms have parallel drywall surfaces and hardwood or laminate flooring. When you sing, your voice bounces off the bare walls and reflects back into the microphone just milliseconds later. This creates flutter echo and a "boxy" room sound that EQ cannot remove.
Worse, room reflections confuse pitch-correction algorithms and create watery phase smearing in voice conversion models. A dry vocal recorded on a $100 dynamic mic or an iPhone voice memo is infinitely more usable than an expensive condenser microphone capturing fluttery room reverberation.
Recorded in a deadened acoustic environment with no room reflections.
Recorded on a phone in close proximity; dry, focused, and workable.
Ambient room hum and reflections bleed into the vocal frequencies.
Flutter echo smashes across consonants and syllable endings.
Budget acoustic hacks that actually work:
- The walk-in closet trick: A closet packed with hanging coats, winter sweaters, and blankets is one of the most acoustically dead spaces in any home. The varied fabric textures absorb reflections across high, mid, and low frequencies.
- Duvet / heavy blanket tent: Drape two heavy duvets over microphone boom stands directly behind and to the sides of the singer. This traps the vocal before it can reflect off nearby walls.
- Face the room, sing away from walls: Position yourself so the back of the microphone points toward deadened treatment, and avoid standing directly in the center of a square room where bass standing waves accumulate.
Golden Rule: It is always possible to add lush, expensive studio reverb to a dry vocal in your DAW. It is nearly impossible to remove a cheap bedroom reflection that was baked into the raw recording.
2. Microphone selection: Dynamic vs. Condenser
Many beginners assume they must buy a large-diaphragm condenser microphone to get professional vocal results. In an untreated home environment, this is often a mistake.
| Microphone Type | Pros in Home Studios | Cons in Home Studios | Best Example |
|---|---|---|---|
| Dynamic Mics (e.g., Shure SM58 / SM7B) | Less sensitive to background noise and distant room flutter; handles loud, aggressive singing with ease. | Requires more preamp gain; slightly darker high-end presence. | Ideal for untreated bedrooms and loud singers. |
| Condenser Mics (e.g., Rode NT1) | Highly detailed, airy high frequencies; captures subtle breath nuance. | Extremely sensitive; picks up computer fans, AC hum, and room reflections easily. | Best for quiet, well-treated spaces or closets. |
| Smartphone Mic (iPhone Voice Memo) | Instantly accessible anywhere; surprisingly clean frequency response in close proximity. | Omnidirectional; requires close placement in a quiet room. | Perfect for fast songwriting guide takes. |
Vocalist's input audio guidelines explain how both studio mics and phone recordings translate through modern vocal processing.
3. Proper microphone positioning and pop protection
Plosives - the explosive bursts of air produced by "p", "b", and "t" sounds - can overload a microphone capsule, creating massive low-end thumps that ruin an otherwise great take.
- Always use a pop filter: Position a nylon or mesh pop filter 2 to 3 inches away from the mic capsule.
- Maintain proper singer distance: Keep your mouth roughly 5 to 6 inches away from the microphone capsule. If you get too close, the proximity effect creates an unnatural boomy bass buildup. If you stand too far back, the room reflections overpower the direct vocal signal.
- Slightly off-axis angle: Angle the microphone slightly toward the singer's nose or cheek rather than pointing directly at their mouth. This lets air blasts fly past the capsule while capturing full vocal tone.
4. Gain staging: Stop recording too hot
In the era of 24-bit and 32-bit digital audio recording, you do not need to push your input levels close to 0 dBFS.
When tracking home vocals:
- Set your audio interface preamp gain so your loudest singing peaks hover between -18 dBFS and -12 dBFS.
- This leaves at least 10 to 12 dB of digital headroom, completely eliminating accidental digital clipping when the vocalist gets passionate in the chorus.
- Digital clipping permanently squares off the audio waveform and cannot be repaired downstream.
Summary
Capturing pro-grade vocals at home is not about spending thousands on vintage preamps. It is about controlling room flutter with soft furnishings, maintaining consistent distance from the capsule, and recording with clean digital headroom.
Once you have a clean, dry recording, you have a foundation that can be mixed, tuned, or transformed into any vocal character you envision.