

Vocal Comping: How to Build the Perfect Lead Vocal Take from Multiple Passes
Master the art of vocal comping. Learn how to organize take folders, select the best phrases, edit transparent crossfades, and prep composite vocal stems for production.
By Vocalist.ai Editorial Team · July 2, 2026 · 5 min read
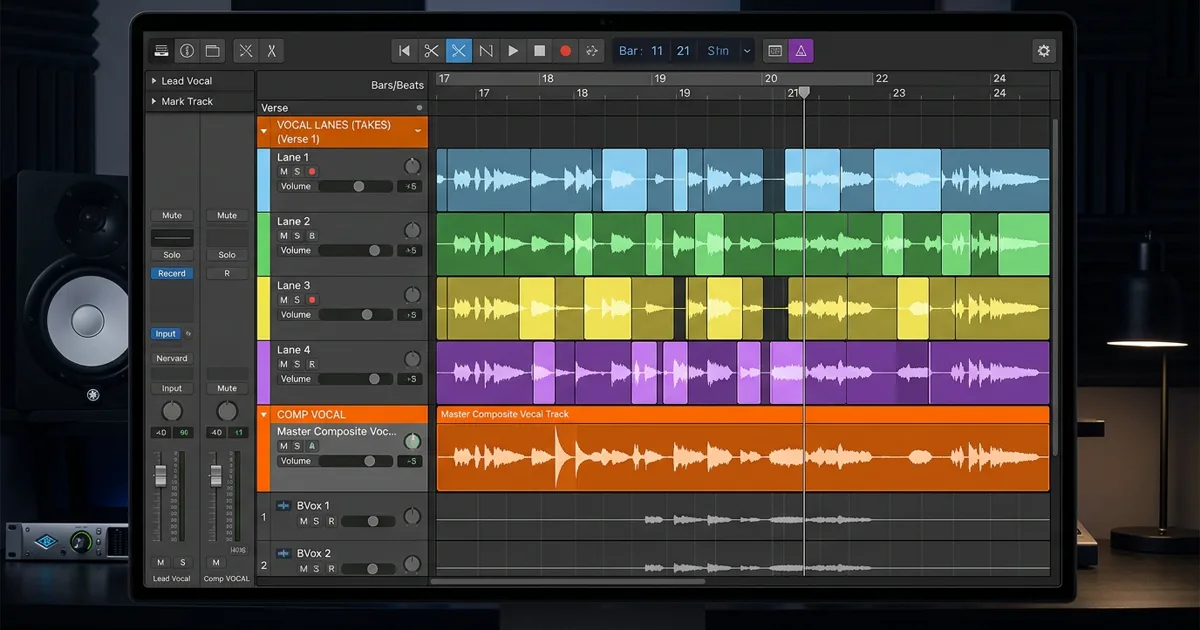
Even the greatest vocalists in the world rarely record a hit song in a single, unedited take. In professional recording studios, the lead vocal you hear on a finished track is almost always a composite vocal (or "comp") - a master take meticulously assembled from the best phrases, words, and syllables across four, six, or ten recording passes.
Vocal comping allows producers to combine the emotional magic of a first take, the pitch accuracy of a third take, and the high-energy belt of a final take into one seamless, flawless master performance.
However, poorly comped vocals can sound disjointed, with audible room tone shifts, abrupt breathing cuts, and jarring dynamic jumps.
Here is a step-by-step masterclass on how to comp vocals transparently, preserve natural emotion, and prepare clean composite stems for downstream tuning and vocal transformation.
The vocal tracking strategy: Preparing for the comp
A great vocal comp begins before you ever touch an editing blade. Follow this tracking protocol:
- Warm up and calibrate: Record one or two exploratory passes to check monitoring levels, headphone comfort, and mic gain staging.
- Track 4 to 6 full passes: Avoid punching in single lines repeatedly. Encourage the singer to perform entire verses and choruses continuously. Full passes preserve natural vocal stamina, phrasing momentum, and emotional arcs.
- Keep mic distance strictly consistent: If the singer leans three inches closer during Take 4, the proximity effect will artificially boost their low-end bass frequencies, making Take 4 impossible to splice smoothly into Take 2. Use a pop filter positioned 5 to 6 inches from the microphone as a physical distance boundary.
The Producer's Axiom: Pitch and timing can be nudged with software; genuine attitude and emotional sincerity cannot. Always prioritize emotional conviction over pitch when choosing keeper takes during a comp.
4 steps to comping vocals like a pro
Once tracking is complete, open your DAW's take-folder or playlist lanes and follow this four-pass comping workflow:
Step 1: Note your gut reactions
Listen to all passes straight through while looking at a printed lyric sheet. Mark stars next to standout moments - a stunning vocal run, an exceptionally vulnerable verse line, or a powerful hook delivery. These standout phrases become the non-negotiable anchors of your comp.
Step 2: Assemble section by section
Comp one musical section at a time (e.g., Verse 1 first, then Chorus 1).
- Compare the phrase across all takes.
- Select the take that best serves the lyrical narrative.
- Ensure the vocal energy naturally ramps up into choruses and calms down in verses.
Step 3: Edit between natural vocal pauses
Never make a comp cut in the middle of a sustained vowel unless an unavoidable click forces an emergency micro-edit.
Always slice audio during:
- Natural pauses between phrases.
- Quiet breath intakes.
- Hard unvoiced consonants (like "k", "t", or "p"), which hide acoustic transitions better than open vowels.
Step 4: Apply equal-power crossfades
Every single splice point must have a crossfade. A 5 to 10 millisecond equal-power crossfade prevents the digital clicks and pops that occur when two independent waveforms are spliced at non-zero crossing points.
| Comp Element | Common Mistake | Professional Fix |
|---|---|---|
| Breaths | Cutting off breaths abruptly, making the singer sound robotic | Keep the breath attached to the phrase that follows it; never mute breathing entirely. |
| Consonants | Splicing mid-consonant, creating double clicks | Cut right before the consonant transient attack starts. |
| Room tone | Splicing quiet takes with loud room noise | Record in a deadened acoustic space so room reflections do not change between takes. |
Preparing your comped vocal for tuning and transformation
Once your comp is assembled and verified for musical continuity, prepare the audio for downstream processing:
- Bounce / Consolidate to a single file: Merge all spliced audio regions into one continuous, unbroken audio file starting from bar 1. This prevents region misplacement across collaborator sessions.
- Clean up silent gaps: Manually edit or gate background noise, headphone spill, and mic stand thumps that occur during pauses where the vocalist is not singing.
- Verify pitch consistency: When combining takes recorded 30 minutes apart, subtle vocal fatigue can cause the singer's pitch center to wander slightly flat. Apply subtle pitch correction across the consolidated file using our vocal pitch correction guide.
- Feed into voice models: If you plan to transform your comped guide vocal into a new artist voice, a clean composite take provides the ultimate source material. Read our AI vocal repair guide to understand why clean source editing prevents conversion artifacts.
Conclusion
Vocal comping is where a raw studio session transforms into a polished, radio-ready performance. By tracking consistent passes, splicing at natural pauses, and blending takes with smooth crossfades, you create composite vocals that feel completely authentic from the first beat to the final fade.