

Dry vs Wet Vocals: What to Record and What to Export
Understand dry and wet vocals, monitor with effects without printing them, and export a clean solo take for tuning, transformation, or later mixing.
By Vocalist.ai Editorial Team · September 22, 2026 · 4 min read
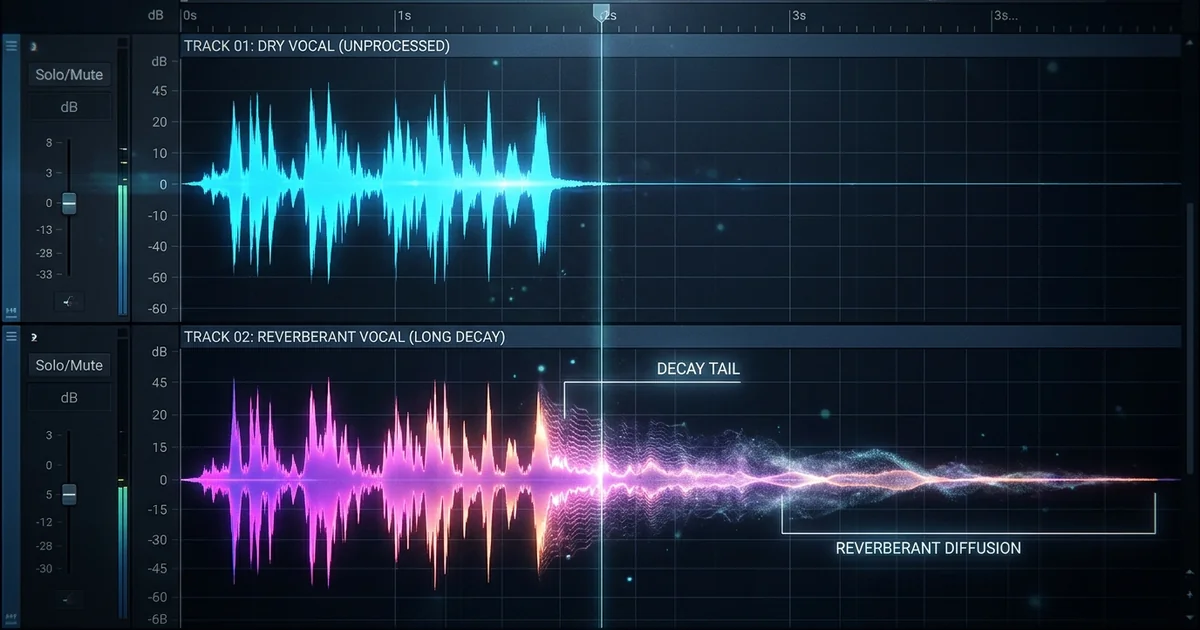
A dry vocal has little or no added effect, particularly reverb or delay. A wet vocal contains an effect or a blend of the direct voice and processing. For vocal transformation, start with one dry, isolated performance so the model receives the voice rather than the surrounding production.
Dry does not mean emotionless, quiet, or badly recorded. It describes the signal you are working with. A close, expressive performance can be dry; a quiet recording in a reflective room can still contain enough ambience to cause trouble.
"Wet" depends on the context
| Context | What dry and wet usually describe |
|---|---|
| Recording a guide | Whether effects are embedded in the recorded file |
| Reverb or delay return | The effect signal, often kept separate from the direct vocal |
| Plugin mix control | The balance between unprocessed and processed signal |
| Transform input | A solo vocal without added spatial effects or accompaniment |
A file can have no reverb but still contain compression, tuning, or room reflections. When sharing a vocal, describe what is actually in it rather than relying only on the word "dry."
Keep the source recording and monitoring effects separate so you can choose the treatment later.
Monitor with reverb without recording it
A singer may prefer a little ambience in the headphones. In a DAW, you can often send the vocal to a reverb return for monitoring while recording the microphone signal separately.
Check the actual routing. An effect on a monitoring return is not the same as an effect printed through an input bus or included in an export. Record a short test, bypass the return, and play back the file to verify what was captured.
Keep monitoring levels comfortable. More reverb can make a take feel flattering, but it can also make pitch and phrase endings harder to judge. Listen to a dry playback before deciding that the performance is finished.
Export a clean vocal from a DAW session
- Choose one performance. Mute doubles, harmonies, ad-libs, and the backing.
- Bypass spatial and character effects. Reverb, delay, chorus, and distortion should not be included in a conventional Transform input.
- Check sends and buses. Bypassing the track's insert reverb does not help if an active return is still in the bounce.
- Decide about tuning deliberately. Keep an untreated version. Pitch correction is optional, not part of the definition of a usable dry take.
- Export from a known bar boundary. Preserve alignment for the return trip.
- Listen to the exported file itself. Do not assume the bounce matches what you heard while soloing.
The first-transformation instructions describe dry solo preparation. For the broader mix order, see vocal chain order.
What if the only vocal you have is already wet?
First look for the original session or an untreated export. That is usually a more direct solution than trying to undo processing.
If the ambience is embedded, De-Reverb can be a cleanup option. The supplied stem pack includes a vocal separated from a mix and its subsequent De-Reverb output:
The vocal stem retains spatial treatment from the supplied mix.
The supplied cleanup output used to prepare the vocal for another stage.
Compare the ambience, vocal tone, and word endings in the two versions. This pair shows cleanup of an existing stem rather than the original untreated microphone recording.
Listen for shortened word endings, unstable vowels, and altered breaths. If the cleanup damages the phrase more than it helps, try a new recording or change the production plan. The De-Reverb guide covers the task in more detail.
Can you remove room sound by turning reverb off?
Only if the reverb is a separate effect. A reflective room is part of what the microphone captured. Bypassing a plugin cannot remove those reflections.
Move away from hard reflective surfaces, reduce nearby reflections where practical, and compare microphone positions with a short test. Do not strain your delivery to compensate for the room. The home recording guide covers input preparation.
Keep dry and wet versions organized
Save the source recording, the edited dry vocal, and the effected version separately. Include the shared export start position in your project notes. If collaborating, say whether tuning, compression, noise reduction, or room cleanup has been applied.
That leaves you free to change the singer model, adjust the tuning, or rebuild the effects later without trying to reverse an already printed mix.